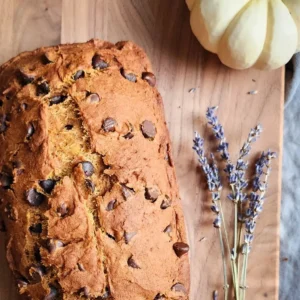
Gluten Free Pumpkin Bread (applesauce + coconut oil)
Gluten free pumpkin bread is the perfect cozy fall breakfast. Soft, warmly spiced, and easy to make — no mixer and no measuring the pumpkin!
Equipment
- 8.5 x 4.5 inch or 9 x 5 inch metal loaf pan, or 1.5 qt Pyrex loaf pan
- Whisk or mixer
Ingredients
Dry
- 3 cups gluten free flour blend - Authentic Foods Steve's GF Cake Flour Blend recommended
- 2 teaspoons baking powder
- 2 teaspoons baking soda
- 1 teaspoon salt
- 2 teaspoons cinnamon
- ¼ teaspoon cloves
Mix-Ins
- 1 1/4 cup dark chocolate chips - dairy free
Wet
- 1 15- ounce can pumpkin
- 1 cup sugar
- 2/3 cup brown sugar
- 1/2 cup coconut oil - extra virgin
- 1/2 cup applesauce - unsweetened
- 4 eggs - large
- 2 teaspoons vanilla
Instructions
Prep
- Preheat oven to 350°F.
- Set out the eggs.
- Melt the coconut oil in the microwave.
- Grease two loaf pans with coconut oil. If you only have one pan, not to worry; see the notes for details.
Measure the Dry
- Measure out the dry ingredients into a medium-sized bowl. Stir with a fork to combine.• 3 cups gluten free flour blend• 2 teaspoons baking powder• 2 teaspoons baking soda• 1 teaspoon salt• 2 teaspoons cinnamon• ¼ teaspoon cloves
- Add the chocolate chips, and stir to combine. Set aside.• 1 1/4 cup dark chocolate chips
Make the Batter
- Measure out the pumpkin, sugar, and brown sugar into a large bowl. Using a whisk, a stand mixer fitted with the paddle attachment, or a hand mixer, mix until combined.• 1 15- ounce can pumpkin• 1 cup sugar• 2/3 cup brown sugar
- Add the melted coconut oil and applesauce and mix (by hand or on low) until combined.• 1/2 cup coconut oil• 1/2 cup applesauce
- Add the eggs and vanilla and mix (by hand or on low) until combined.• 4 eggs• 2 teaspoons vanilla
- Add the dry ingredients. Mix until fully incorporated. (If mixing by hand, you might want to switch to a large spoon or flexible spatula at this point.) Scrape down the bowl to ensure everything is fully mixed.
Bake the Pumpkin Bread
- Use a knife to (more or less) divide the batter in half, pushing the batter into opposite sides of the bowl. Scoop the batter from one side of the bowl into one greased loaf pan, and scoop the remaining batter into the other pan.
- If you would like, add a few more chocolate chips to the top of each loaf, then use a knife or spatula to smooth the loaf’s surface. Score the tops of the loaves by dragging a knife down the length of each loaf
- Bake the pans on the same rack (with a few inches between them to allow the air to circulate) at 350°F for 40 minutes.
- After the loaves have baked for 40 minutes, tent each pan with a sheet of tin foil to prevent excessive browning (see notes for instructions). Bake the loaves for another 15 minutes or until the loaves are nice and domed, have a warm orange color, and are firm when lightly tapped on top. Cool on a wire rack for about 5 minutes before removing from the pan to continue to cool (see notes for instructions).
Notes
TIPS
- One Loaf Pan: If you only have one loaf pan, simply bake one loaf and refrigerate the rest of the batter in the meantime. After you take the first loaf out of the oven, take the batter out as well so it can come to room temperature. Once the first loaf has cooled for 5 minutes, remove the loaf and wash the pan. Once the pan is no longer warm, fill with the remaining batter and bake as directed above.
- Dark Loaf Pan: If you have a dark gray loaf pan, King Arthur Baking Company recommends lowering the temperature by 25 degrees and reducing the bake time. So I would suggest baking the loaf at 325°F and checking the after 40-45 total minutes (although I haven’t tested this).
- Tenting the Pans: Fold a piece of tin foil in half and place it loosely over the pan, with its pointy side up like a tent. Repeat with the other pan. The peak of the “tent” gives the bread space to continue to rise, and the foil keeps the top from browning further. You don’t need to worry about crimping the sides of the foil down.
- Removing the Loaf from the Pan: If you’ve always wondered how the heck to get a quick bread out of its pan, I have a 10-step system that hasn’t failed me yet!
-
- Get out a butter knife, two hot pads, and a cooling rack.
- Run the knife along the inner edge of the pan to loosen the sides.
- Place a piece of paper towel over the top of the loaf.
- Place a hot pad on top of the paper towel.
- With your right hand, take hold of the pan from above (the hot pad should keep you from burning yourself), and lift the pan up.
- Using an additional hot pad, hold the bottom of the pan with your left hand.
- With both hands now gripping the pan, flip the pan over. The pan is now on top.
- Using your left hand, lift the pan up and off the loaf. Set the pan to the side. (If it doesn’t come off, give it a little wiggle. If it still doesn’t come off, run the knife around the edges and try again. If it STILL doesn’t come off, wait 5 minutes and try again.)
- Use your left hand to pick up the cooling rack and set it (upside down) on top of the loaf (which is also upside down, in your right hand). With both hands gripping the cooling rack and loaf, flip the whole situation over.
- Set the rack on the counter, remove the hot pad and paper towel, and you are done!
-
- Storage: Once cooled, the bread can be stored wrapped in plastic wrap at room temperature for up to 3 days.
- Freezing the Loaf Unsliced: Pop the cooled pumpkin bread into a Ziploc bag and freeze. If you’re going to keep it in their a while, you might want to wrap it in plastic wrap before putting in the Ziploc bag to prevent freezer burn.
- Freezing the Loaf Sliced: Alternatively, you can slice the loaf before freezing. Place a small piece of parchment paper between each slice, then place the entire sliced loaf into a Ziploc bag and freeze. Whenever you want a yummy treat, pull out a slice and microwave for about 30 seconds on medium power or until thawed and warm. (I often eat one loaf and then freeze the second loaf in this way—more days of pumpkin bread!)
- Gluten Free: This recipe is gluten free as written! Make sure to use Authentic Foods Steve's GF Cake Flour Blend, or if that's not possible, use another GF 1:1 flour blend that has xanthan gum in it.
- Dairy Free: This recipe is dairy free as written. Make sure your chocolate chips do not have milk in them!
- If You Aren't Gluten Free: If you don't need to avoid gluten, feel free to swap out the GF flour with regular flour. Remember not to overmix the flour! Stir just until the white disappears. Also, the bread might need less time to cook, so check the loaves 5 or so minutes early.
- If You Aren't Dairy Free: If you don't need to avoid dairy, feel free to use any chocolate chips you like! I would still recommend dark chocolate, but that's just me. I still recommend using coconut oil because I think oil in general is better in most quick breads and muffins, and unrefined virgin coconut oil has some health benefits as well.
- Making It Vegan: This recipe might be a bit harder to make vegan because it uses so many eggs. If you do try it with flax eggs or aquafaba, please let us know how it turns out in the comments!